

Is There A Repair Sleeve Made For A Sink/water P-trap Outlet To The Wall
i / 10
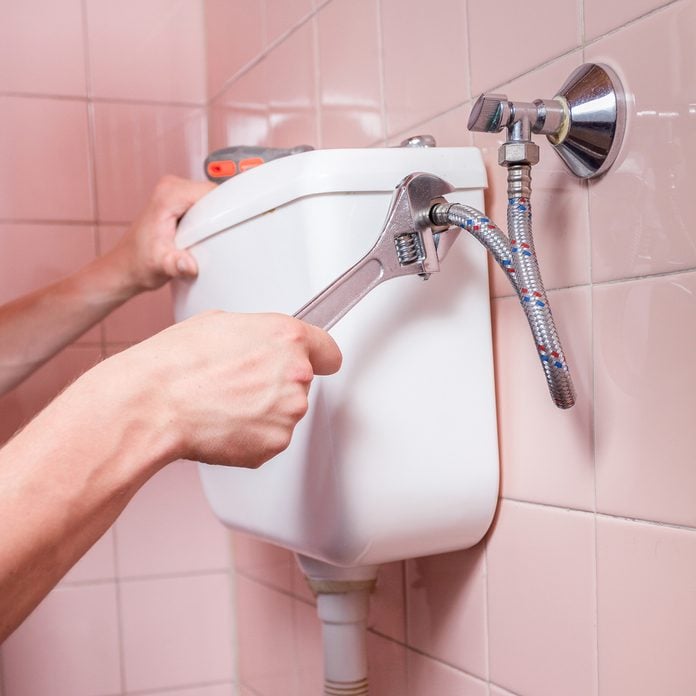
Overtightening Connections
Overtightening supply tubes, pipe and fittings and toilet bolts is the #1 DIYer mistake. If you crank likewise hard on a galvanized or black pipage, coupling, tee or elbow, you lot take a chance cracking the plumbing fixtures. The crack may not happen right abroad, but the excessive forcefulness tin break the fitting weeks later, causing a flood.
Overtightening the plastic fittings on toilet and faucet supply tubes is fifty-fifty more common. It just doesn't take that much torque to seal a supply tube. If you tighten the hex nuts too much, they'll eventually break and leak. Plus, overtightening toilet cupboard bolts at the floor or between the basin and tank tin crack the porcelain and destroy the toilet.
2 / x

Wrapping Thread Tape Astern or Using the Incorrect Tape
PTFE thread record (commonly chosen Teflon tape) must wrap clockwise effectually the threads for it to work properly. Simply, many DIYers wrap information technology astern and then the tape actually unwinds from the threads as they tighten the fitting. That defeats the whole purpose of using thread record since information technology tin can't seal if it isn't embedded in the threads.
Hither's a tip for proper wrapping: Wrap iii times effectually the threads with the last wrap facing to the left as you screw the pipe into the fitting. If that last wrap is pointing to the right, stop and re-wrap it.
Besides, use the right record.
• Use thin white or thick pink thread tape for fittings that conduct water.
• Use yellow gas-rated tape for threaded gas line connections.
• Never use thread tape on pinch or flare fittings
Connect your new gas appliance yourself and save $200!
3 / x
Using Bleed Cleaners as a Showtime Choice
The easiest way to remove kitchen and bath sink clogs is to apply a snake or a barbed drain cleaning tool. Or, simply remove the P-trap and pour out the clog. Just as well many DIYers attain for the liquid drain cleaner first and they cascade in way more than than the recommended amount. That'southward a fault because liquid drain cleaner isn't the best choice and more certainly isn't better. In fact, liquid bleed cleaner tin create more than problems than it solves. Hither's why:
• If the liquid cleaner doesn't articulate the clog, you or your plumber will probably take to remove the trap arm later on and it'll exist filled with caustic corrosive bleed cleaner. Won't that exist fun?
• Using too much drain cleaner, or using it likewise oftentimes, can damage metal traps and pipes, causing leaks.
• Liquid drain cleaner destroys the rubber gasket used in "mission" mode couplings. If you have whatever of those couplings in your drain lines and you use liquid drain cleaners, y'all'll harm them, causing leaks in the hereafter.
This is the all-time manner to unclog a sink yourself—no plumber required!
four / ten

Tackling a Plumbing Task Without Spare Parts
DIYers often brand the mistake of ownership just a cartridge or washer for a faucet repair. But if the washer or cartridge are worn, chances are other faucet parts are worn likewise. If you don't replace the stalk seal and gasket and O-rings when replacing the washer or cartridge, you'll probably wind upward with a leaky faucet. That'll hateful a 2nd trip to the hardware store and another faucet disassembly/reassembly. Those peripheral parts are cheap, so get in a rule to purchase them all upfront and "rebuild the faucet" rather than replacing just a single part.
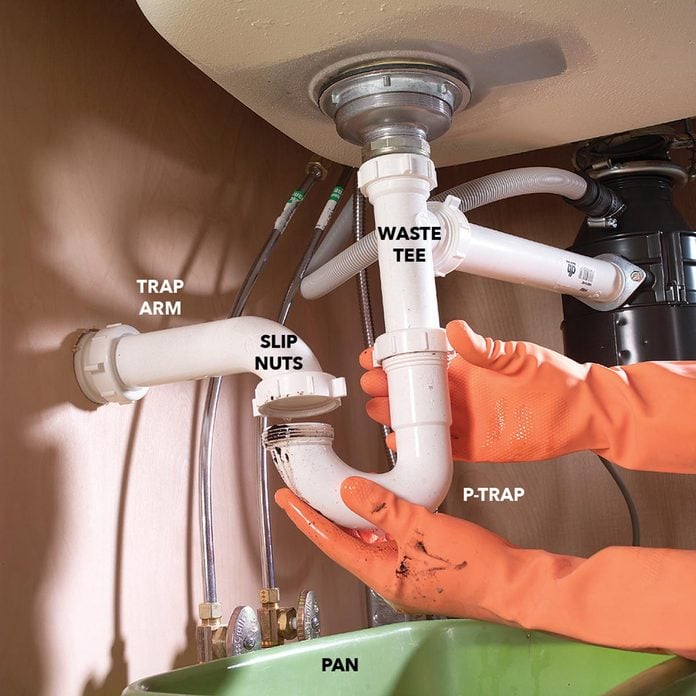
The same rule applies when working on drain lines. If you'll be disassembling a metal p-trap and arm, make sure y'all have enough rubber compression gaskets to replace the gasket in every joint y'all detach. The beveled poly washers used on PVC traps and arms tin can be reused, but you should still accept a few spares on hand in case you lose one or notice the quondam one is cracked.
Fix a leaky faucet yourself and save some $$$.
Install an automatic leak detector.
5 / x
Not Turning Off the Water
Many DIYers think they tin can leave the h2o on and speedily bandy in a new valve. Yeah, that rarely turns out well. If you can't attach the new valve or faucet, you'll have full water force per unit area flooding the room and dripping downwardly to the lower floors. Why risk thousands of dollars in harm when all it takes is a few extra minutes to close off the main water supply valve? Experienced plumbers close off the water. So should you. Find the chief water shut off in your house.
six / ten

Using Too Much Muscle On a Stuck Shut Off Valve
Sink and toilet close off valves tend to seize when not operated for long periods of time. If you can't plow the knob by hand, don't recollect you can solve the problem by applying more than muscle. Yous'll not just break off the knob, just you can likewise break off the valve stem at the same time. The trouble is that the stalk packing seal has welded itself to the valve stem, preventing information technology from turning. The fix is use an adjustable wrench to loosen the stem nut just plenty to break the bond so y'all can turn the knob. When you're washed, only snug upwards the stem nut and make sure there'due south no leak.
Replace an old balky close off valve.
Here's how to replace a shut off valve when you can't shut off the water.
7 / x

Sweating Copper Pipes With Water in the Line
Copper pipes and fittings must be completely dry before sweating. If there's any h2o near where y'all're working, it'll cause the articulation to leak. Trust us, nosotros've tried heating the water with the torch to boil it off. It doesn't work. The steam simply creates pin-holes in the solder. When you lot turn on the water, you'll run into fine jets of h2o shooting out of the joint. Then you'll have to redo the entire job. The solution is to plug the pipe with white staff of life, a special sheathing-like plug or a special tool before striking the joint with a torch. Become a soldering expert with these tips.
viii / x

Non Having the Right Tools
Plumbers make the job look easy considering they always have the right tools. DIYers ofttimes try to skate by and make-do with the tools they have on hand. That'due south where things go really incorrect. Trying to remove an quondam galvanized nipple with an ordinary pipage wrench or slip joint pliers can pause the pipe and get out the threads in the wall. You can prevent that kind of damage by buying an inexpensive set of internal pipage wrenches. The same advice applies to other plumbing repairs.
• Avoid dissentious the finish on your faucet with a strap wrench. Or wrap the jaws of an adjustable wrench with electrician'due south tape.
• Remove stubborn faucet supply tubes and fasteners with an extendable basin wrench.
• Get perfectly square cuts on tubing using a tubing cutter rather than a hack saw.
• Speed up copper burnishing with a combination interior/exterior wire brush.
Replace a faucet easier and faster with this cool tool.
How to apply an internal pipe wrench.
Become a better DIY plumber with these pro tips.
9 / 10

Mixing upwardly Wyes, Tees and Elbows
Knowing which drain fittings to use in each application is critical to avoiding code violations and actually unpleasant smells. In this picture, a DIYer has installed a wye to connect the p-trap to the vertical bleed. But they had to add together a 45-degree elbow to brand the horizontal p-trap connection. This setup may look okay, but information technology'southward a code violation that tin cause real problems. Equally it sits, the drain h2o will flow so fast downwards the steep slope that information technology can siphon water out of the p-trap, allowing sewer gas to enter the house. In other words, this setup really stinks. The DIYer should accept used a sanitary tee in this application. All the same, you can't use a germ-free tee in all drain applications. You can't utilise it to connect two horizontal pipes or a vertical pipe to a horizontal bleed. Unlike situations call for a tee, wye or a long or short sweep elbow. Plus, you tin can't apply 90-degree vent elbow to change direction in a drain line (unless you really similar cleaning out clogs). In other words, you've got to know when to apply each type of fitting. You tin can find the proper uses for each fitting in a plumbing guide book. Or, touch base with your local plumbing inspector before buying parts.
How to choose betwixt PVC and ABS pipage.
Approved ways to join dissimilar pipes.
ten / 10

Installing a Saddle Valve for an Ice Maker or Humidifier
Piercing saddle valves don't see current plumbing codes. However, they yet come packed in some water ice maker and furnace humidifier kits and you lot can even so buy them at home centers. So DIYers proceed to install them. That's a big mistake. Saddle valves are notorious for leaks, especially after existence subjected to the close-and-opened cycle many times. Since they're ofttimes installed in out-of-the-way places, the leak can go unnoticed for months, causing mold problems. Toss the saddle valve and install a brawl valve instead. If yous've already installed a saddle valve, remove it and install a ball-style shutoff valve now earlier the old valve starts leaking.
Learn how to install a water valve for your ice maker.
Upgrade your ice maker water line.
Originally Published: Jan 24, 2022

Is There A Repair Sleeve Made For A Sink/water P-trap Outlet To The Wall,
Source: https://www.familyhandyman.com/list/the-10-most-common-plumbing-mistakes-diyers-make/
Posted by: porterallic1989.blogspot.com
0 Response to "Is There A Repair Sleeve Made For A Sink/water P-trap Outlet To The Wall"
Post a Comment